Keep this fail-safe recipe for delicious Microwave Corn On The Cob handy, especially when you don’t want to endure the scorching heat outside. Am I right?!?!? Microwaving corn on the cob yields tender and flavorful kernels, without the hassle of boiling a large pot of water, cleaning a grill, or preheating an energy-draining oven. Let’s give it a try!

Why Microwave Corn On The Cob?
The microwave provides a perfect steaming environment for corn on the cob, ensuring even cooking with no air leaks. It offers a hassle-free and effortless cooking experience, resulting in deliciously satisfying outcomes. Unlike boiling or grilling, which may strip away the corn’s flavor or overpower it with excessive charring, the microwave method preserves the natural taste without any overpowering elements. (Although I do appreciate char, it’s not preferable when it dominates the flavor.)
This recipe couldn’t get any simpler. Prepare yourself for a delightful serving of perfectly cooked, buttery Microwave Corn On The Cob by gathering the following ingredients.
How Long To Microwave Corn On The Cob
To properly microwave a fresh, full-sized ear of corn on the cob (approximately 8 inches long), set your microwave to high for approximately 4 minutes. This timing may vary depending on your microwave’s wattage. If you decide to stack multiple cobs, each ear still requires 4 minutes of cooking time. Therefore, if you have 4 corn cobs, they should be microwaved for a total of 16 minutes on high. In the case of frozen cobs, it is recommended to microwave them for at least 5 minutes per ear. For half-cobs, the cooking time should be reduced to 3 minutes per ear.
The average wattage of a microwave is 1000 watts, but it may vary in different models. Therefore, you may need to modify the cooking time accordingly. If you are unsure about the wattage of your microwave, refer to the manufacturer’s website and search for your model number, usually located on the interior side of the door.
What To Serve with Corn On The Cobb
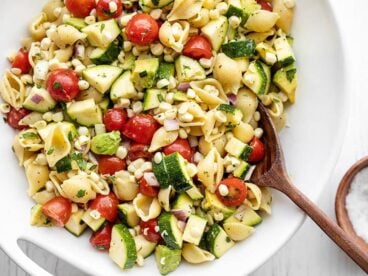
Microwave Corn On The Cob is a great accompaniment to refreshing summer salads such as Panzanella or Summer Vegetable Pasta Salad. It also makes a delicious side dish when served alongside BBQ Ribs or Sloppy Joes. Add some traditional favorites like Cumin Lime Coleslaw, Baked Beans, or Southern Style Potato Salad to complete the meal.
How To Pick Good Corn
When selecting a high-quality ear of corn, look for golden brown corn silk tassels protruding from the top of the ear. These tassels should feel slightly damp and fresh when touched. Conversely, if the tassels are dry or black, it indicates that the corn is old. To further assess its freshness, peel back the husk slightly and check if the kernels are plump. If any kernels are missing or dry, it suggests that the corn cob is past its prime.<br><br>To maintain the freshness of uncooked corn on the cob, store it in the refrigerator with the husk open to allow air circulation and prevent drying out while preserving its flavor. Cooked cobs can be frozen for up to a year by ensuring they are thoroughly dried and individually wrapped in wax paper, followed by aluminum foil. Finally, store them in an airtight container to maintain their quality.
How to Make Microwave Corn On The Cob – Step by Step Photos

To begin, trim the 4 cobs to suit the dimensions of your microwave. If you’re unsure about the appropriate size, you can use the inner revolving plate of your microwave as a reference. It is not necessary to remove the husks. If your corn cobs are already husk-free, they are likely already cut to fit, so you can proceed to step 2.

To prepare the corn, briefly rinse the cobs under running water and individually wrap them in damp paper towels. Microwave the cobs on high power for approximately 4 minutes per cob. Remember, you can save time by placing up to 4 cobs on a microwave-safe plate and adjusting the cooking time accordingly: 4 minutes for fresh corn or 5 minutes for frozen corn. Keep in mind that microwave strength may affect the cooking time.

When the kernels’ color has deepened and become glossy, the cobs are ready. Wait for the cobs to cool down before handling them to avoid burning yourself. Remove the paper towel and cut off the stem end of the cobs.
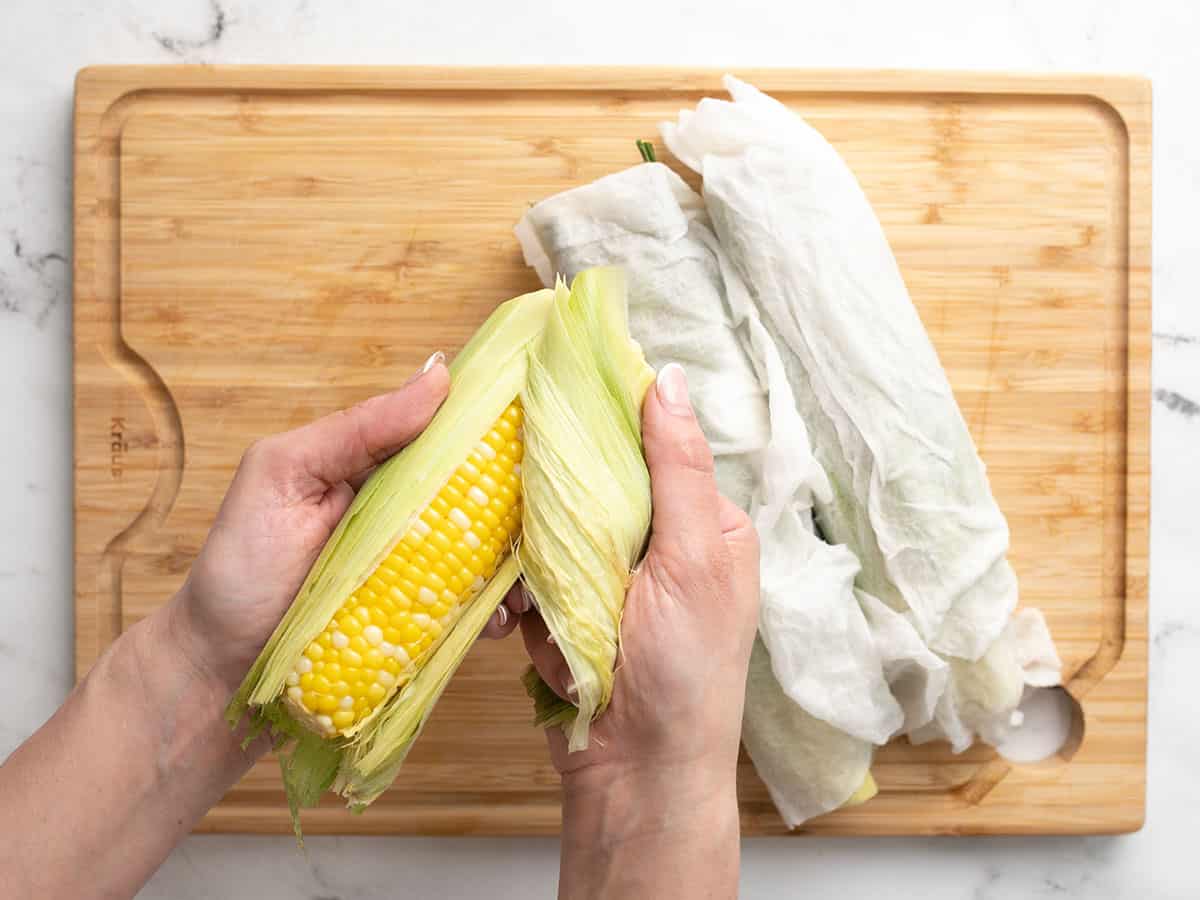
Remove the husk, which will easily come off, taking most of the silk with it.

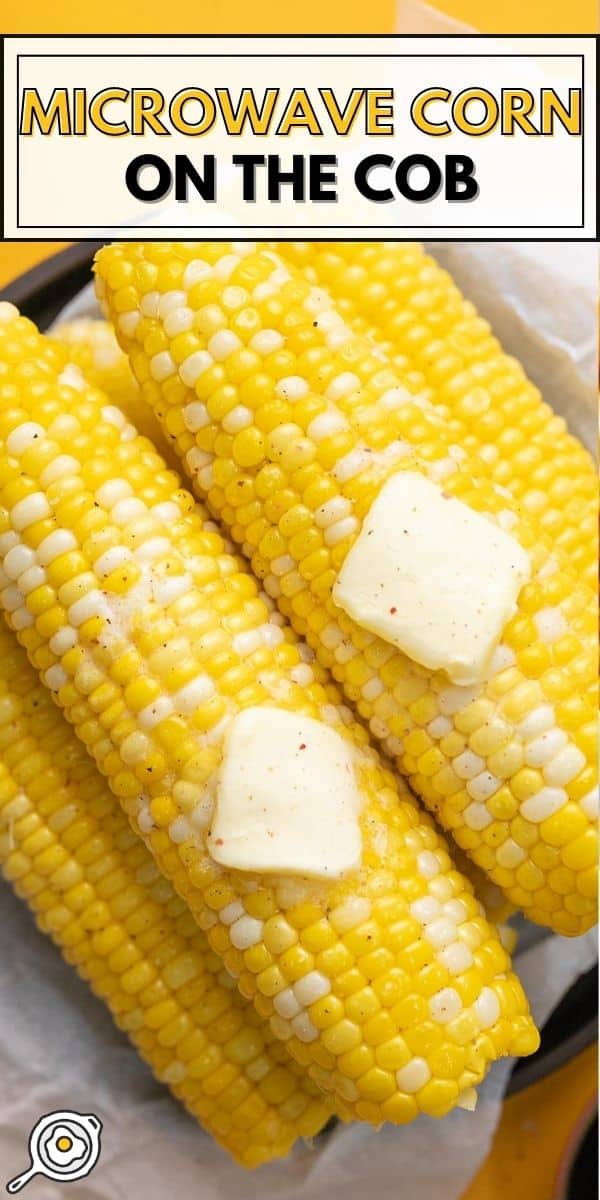
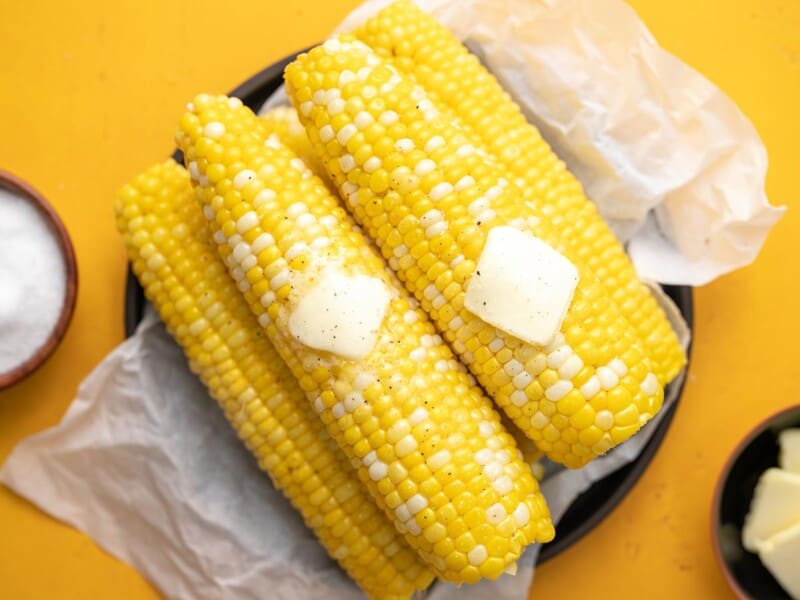
That’s all there is to it! Simply add 1 tablespoon of salted butter on each cob and you’re finished. Enjoy with grilled or roasted meats, summer sides, salads, or savor them on their own. I devoured 8 cobs after trying out this recipe and then fell into a blissful nap induced by the corn cobs. I cannot emphasize enough how much I recommend it!
Warm Corn and Avocado Salad

Roasted Corn Quesadillas
Summer Sweet Corn Salad