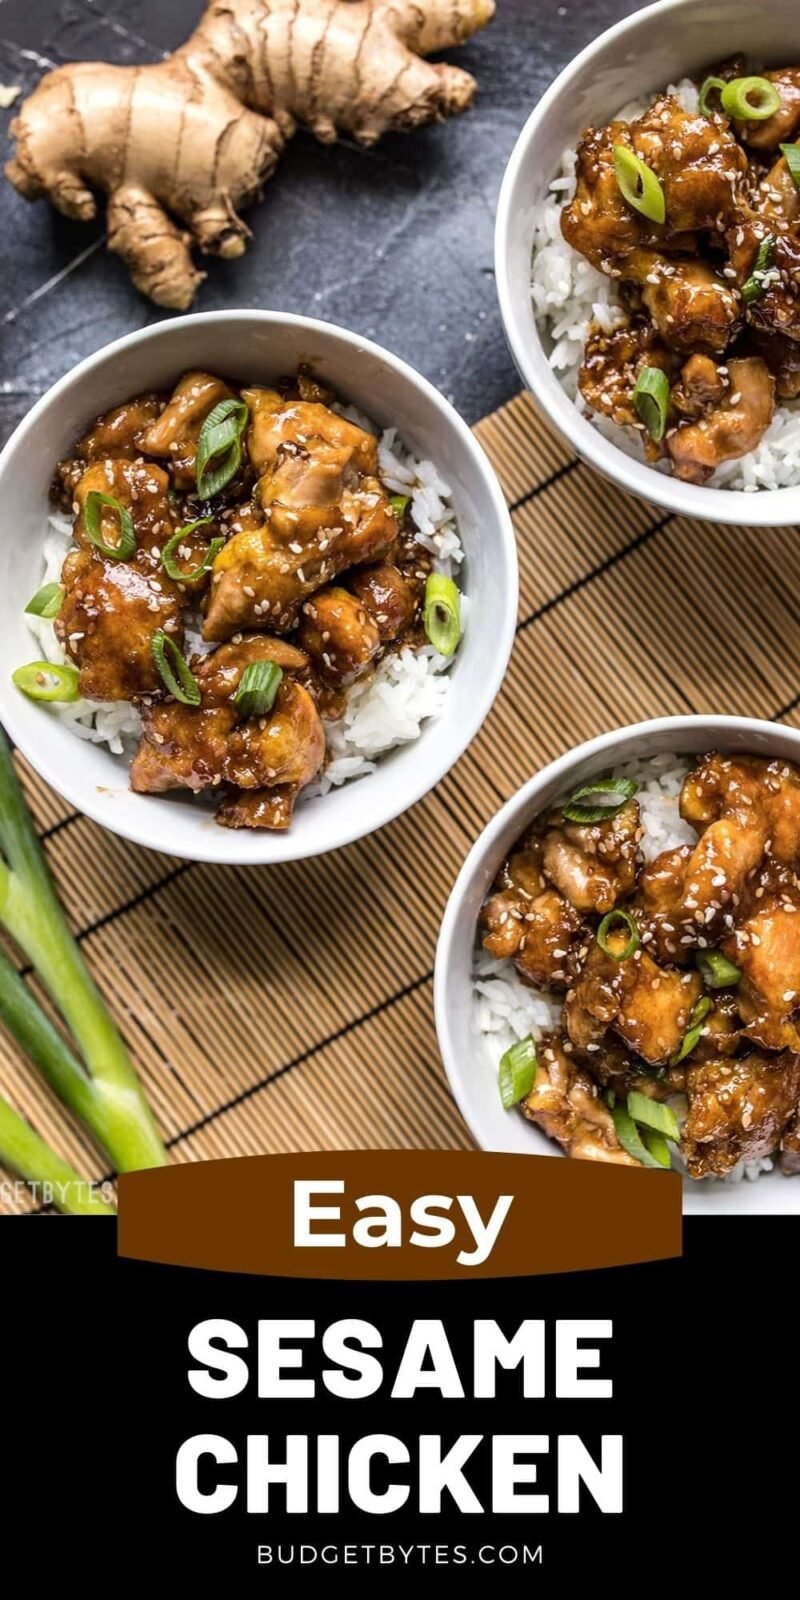
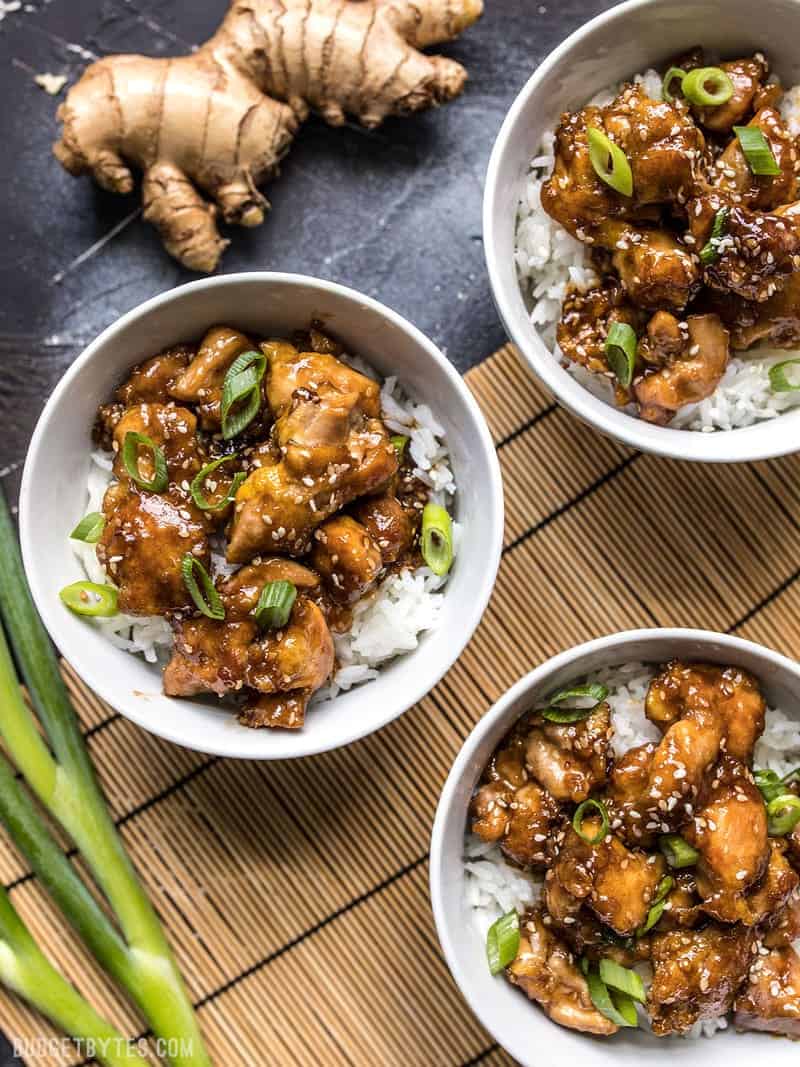
You’ll be enticed to ditch your take-out menus because this Easy Sesame Chicken recipe is incredibly simple. The delectable sauce requires only a handful of ingredients, all of which you can easily store for a long time (remember to freeze your ginger). In fact, you might find yourself craving this sesame chicken right away. Additionally, this homemade version is perfect for your weekly meal preparation.
It has been nearly five years since I originally shared this recipe for Easy Sesame Chicken. Today, I decided it was time to revisit it and make some improvements. Over the years, I have gained a lot of knowledge and experience in cooking, and I wanted to apply that to this beloved recipe.<br><br>Firstly, based on feedback from countless reviews, I have doubled the amount of sauce. Many agreed that the dish needed to be saucier, so I wanted to address that. Additionally, I have carefully adjusted the flavors in the sauce to achieve a better balance. While the ingredients remain the same, I have made slight modifications to enhance their harmony.<br><br>Lastly, I have made a small adjustment to the cornstarch in the sauce. By reducing the amount, the finished sauce now has a smoother texture and doesn’t thicken excessively. This change ensures a more enjoyable dining experience.<br><br>I truly hope you enjoy this updated version of Easy Sesame Chicken as much as I do.
What is Sesame Chicken?
If you haven’t tried this popular Chinese-American fast food dish, it consists of bite-sized chicken pieces that are tenderized, coated in a mixture of egg and cornstarch, deep-fried until crispy, and finally tossed in a delectably sweet, salty, and tangy sauce. The sauce also carries a hint of toasted flavor from sesame seeds. This well-loved dish can be found in numerous Chinese-inspired takeout restaurants throughout America.
No Deep Frying Required
This recipe is designed for those who share my dislike for deep frying. To minimize the amount of oil, the chicken is cooked with a small quantity. Consequently, the edges won’t turn out as crispy as they would in a deep fry. However, in my opinion, the benefits far outweigh this drawback. There is no need to handle leftover oil, your house won’t be filled with the smell of cooking oil, and you won’t have to worry about oil splattering and causing harm. So, sacrificing crispy edges is definitely worth it.
Use Chicken Thighs or Breasts
Below, I opted for chicken thighs due to their affordability and tenderness, making them an ideal choice for this recipe. However, if you prefer, you can use chicken breast cut into smaller pieces, although it will not provide the same texture as thighs. If you decide to use chicken breast, ensure that you cut it into smaller pieces as the eggwash may not adhere well to larger ones.
What to Serve with Sesame Chicken
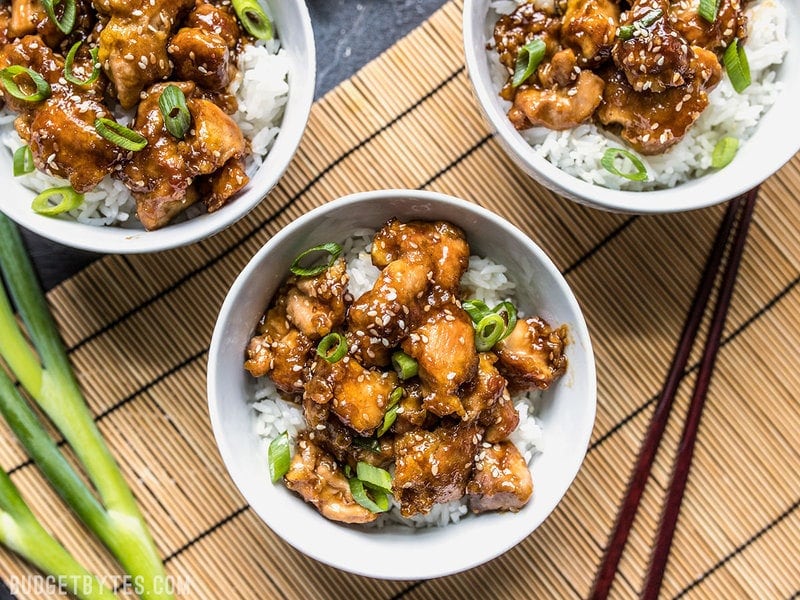
One of my favorite combinations is serving jasmine rice and a side of steamed broccoli alongside my Easy Sesame Chicken. This meal is not only incredibly satisfying, but it also holds up well for meal prepping! Additionally, it pairs perfectly with other delicious options like Crunchy Cabbage Salad, Sesame Cucumber Salad, Easy Egg Drop Soup, and Savory Coconut Rice.
How to Make Sesame Chicken – Step by Step Photos
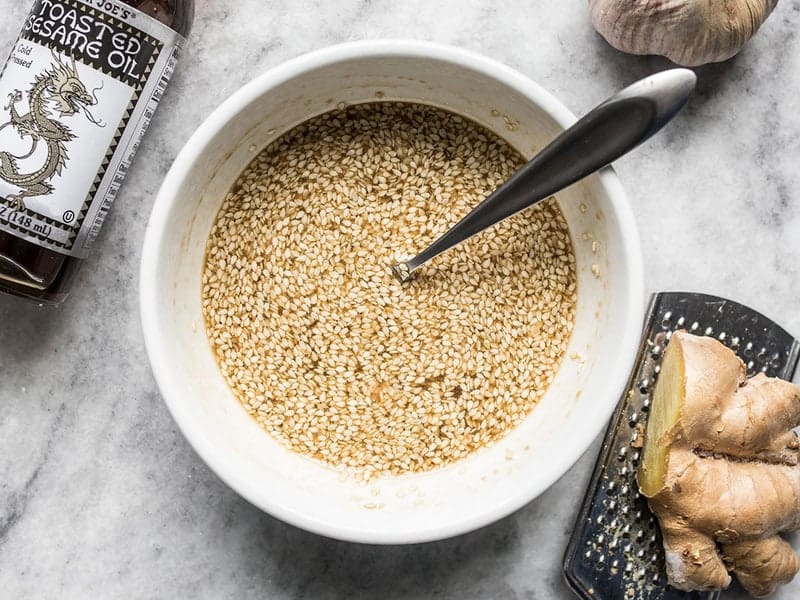
Prepare the sauce in advance to have it readily available when required. Combine 1/4 cup of soy sauce, 2 tablespoons of water, 1 tablespoon of toasted sesame oil, 3 tablespoons of brown sugar, 1 tablespoon of rice vinegar, 1 teaspoon of freshly grated ginger, 2 minced cloves of garlic, 1/2 tablespoon of cornstarch, and 1 tablespoon of sesame seeds in a bowl.
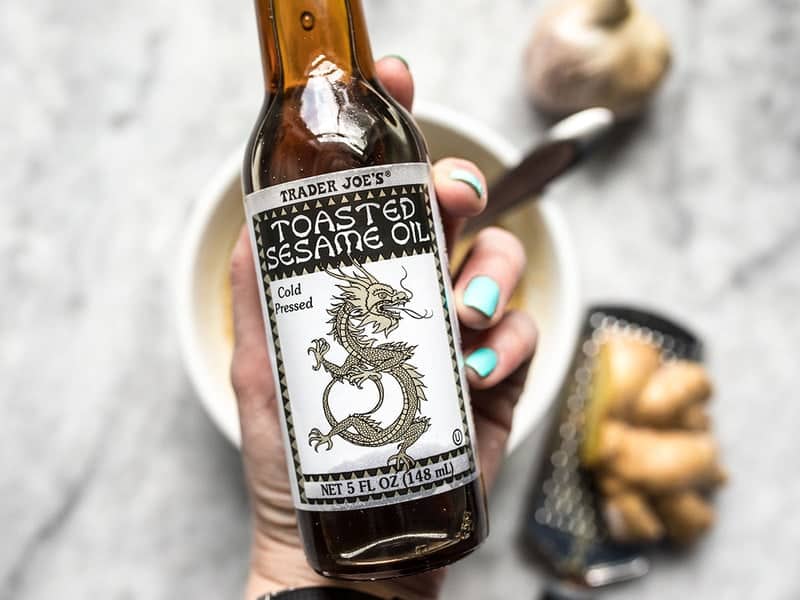
Can we take a moment to discuss toasted sesame oil? It is essential to choose the toasted variety in order to achieve the rich and nutty flavor that perfectly complements sesame chicken. Not all brands explicitly label their oil as “toasted,” but you can identify it by its deep brown color. Regular sesame oil, on the other hand, resembles the color of straw or vegetable oil. Opt for the brown variety which is typically found in the international foods aisle, rather than the baking aisle where other oils are located.
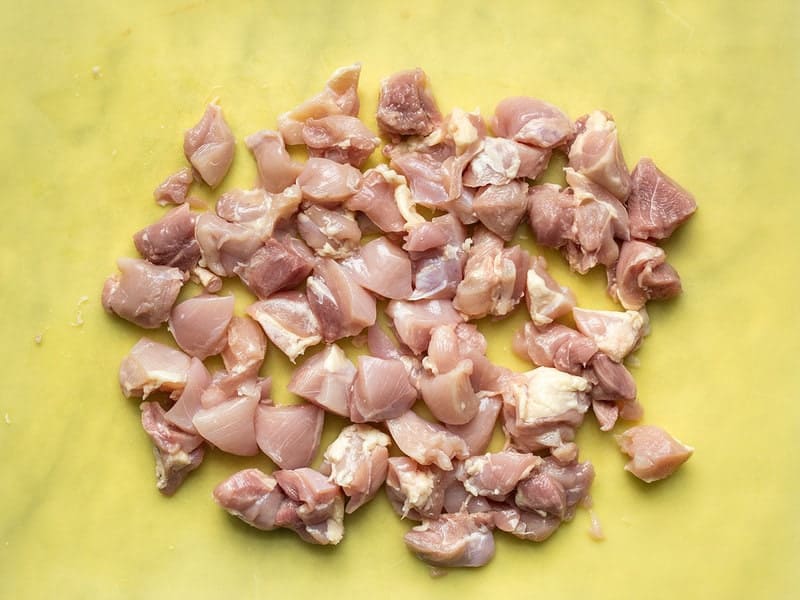
Afterwards, start by removing any excess fat from a pound of boneless, skinless chicken thighs. Proceed to cut the thighs into small cubes, approximately one inch in size. For my portion, three chicken thighs equated to about one pound.
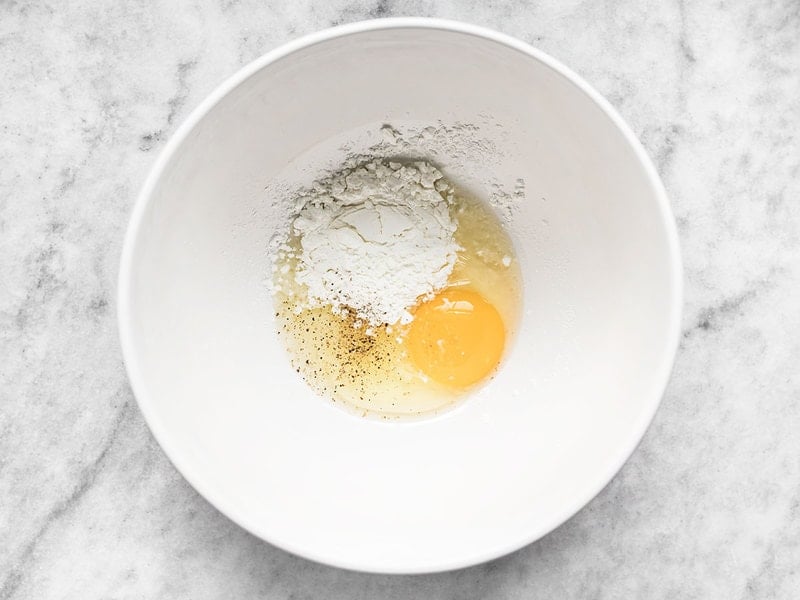
In a medium bowl, combine 1 large egg, 2 tablespoons of cornstarch, and a pinch of salt and pepper.
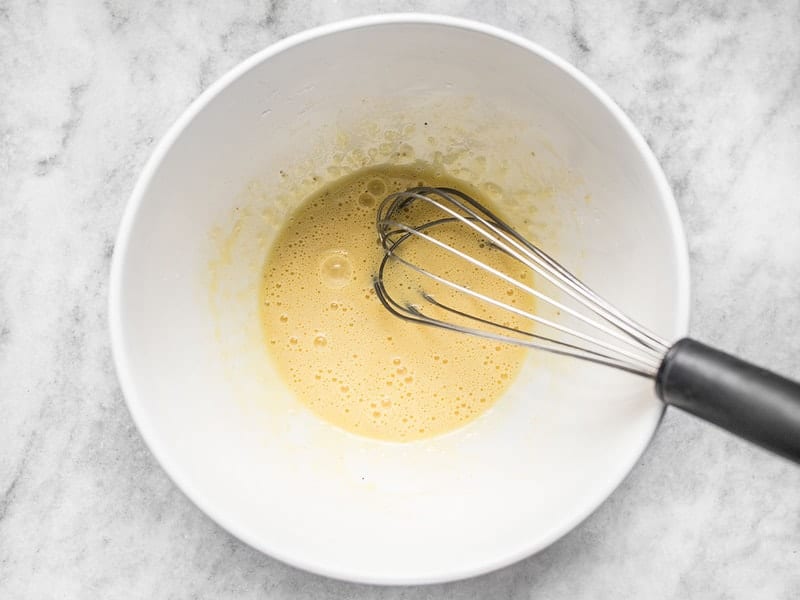
Combine the egg and cornstarch, whisking vigorously until the mixture becomes light and frothy. Initially, it might appear thick, but as the cornstarch dissolves in the egg, it will gradually thin out and achieve a pleasant frothy consistency.
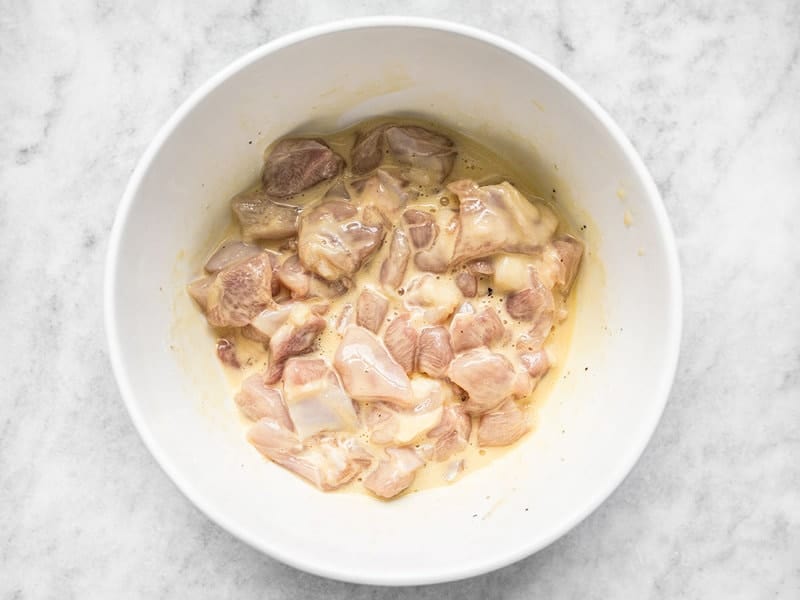
Put the chicken thighs into the egg mixture and mix well to ensure they are evenly coated.
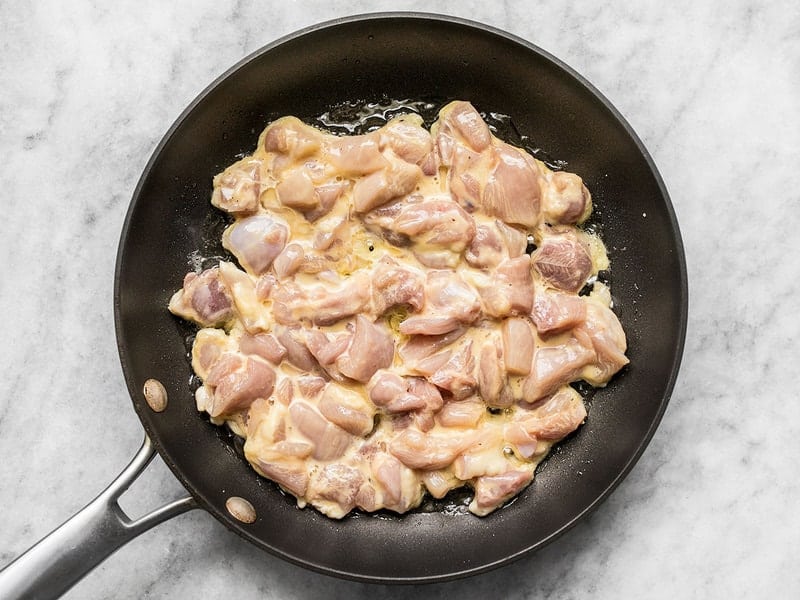
Begin by adding 2 tablespoons of cooking oil to a generously sized skillet and heating it over medium heat. It is crucial to wait until the oil is extremely hot. Ensuring the skillet reaches the desired level of heat is of utmost importance. Once the skillet is adequately heated, gently swirl it to ensure the oil covers the entire surface. Proceed to add the chicken, ensuring it is spread out evenly in a single layer. Allow the chicken to cook undisturbed until the bottom turns a delightful golden brown. It might resemble a single circular pancake, but there’s no need to worry, as we will break it into smaller pieces later on.
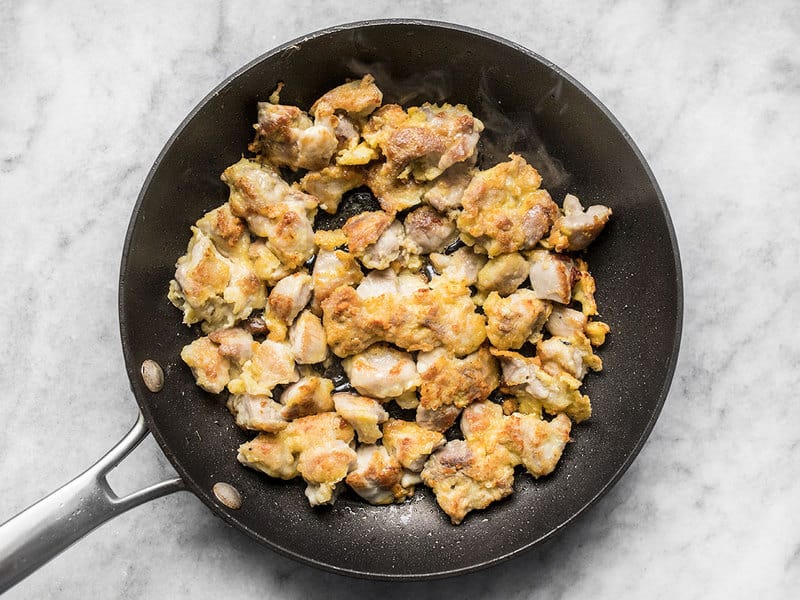
Next, flip the chicken pieces with caution, gently breaking them apart into smaller pieces as you turn them. Cook the other side until it is browned and fully cooked. Avoid excessive stirring, as this could cause the egg coating to detach from the chicken. It is normal if some of the chicken pieces remain slightly stuck together at this stage. Just remember not to over-stir.
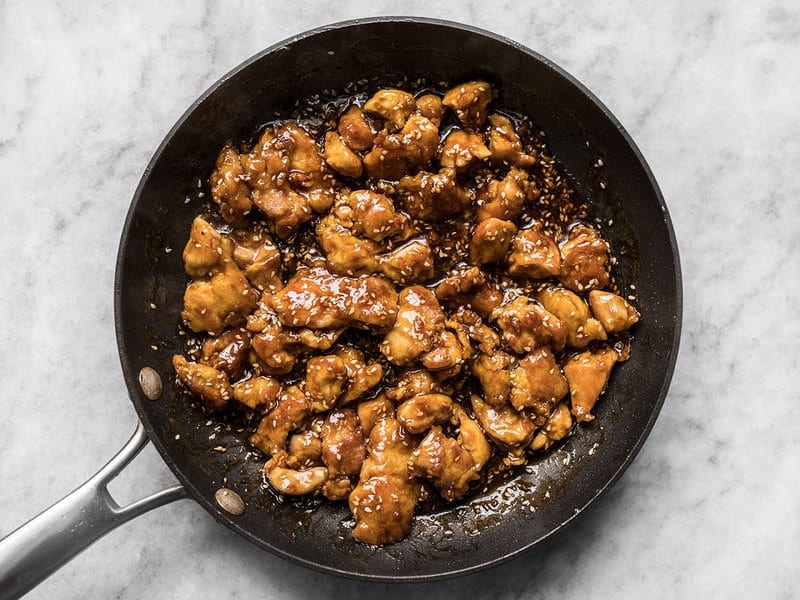
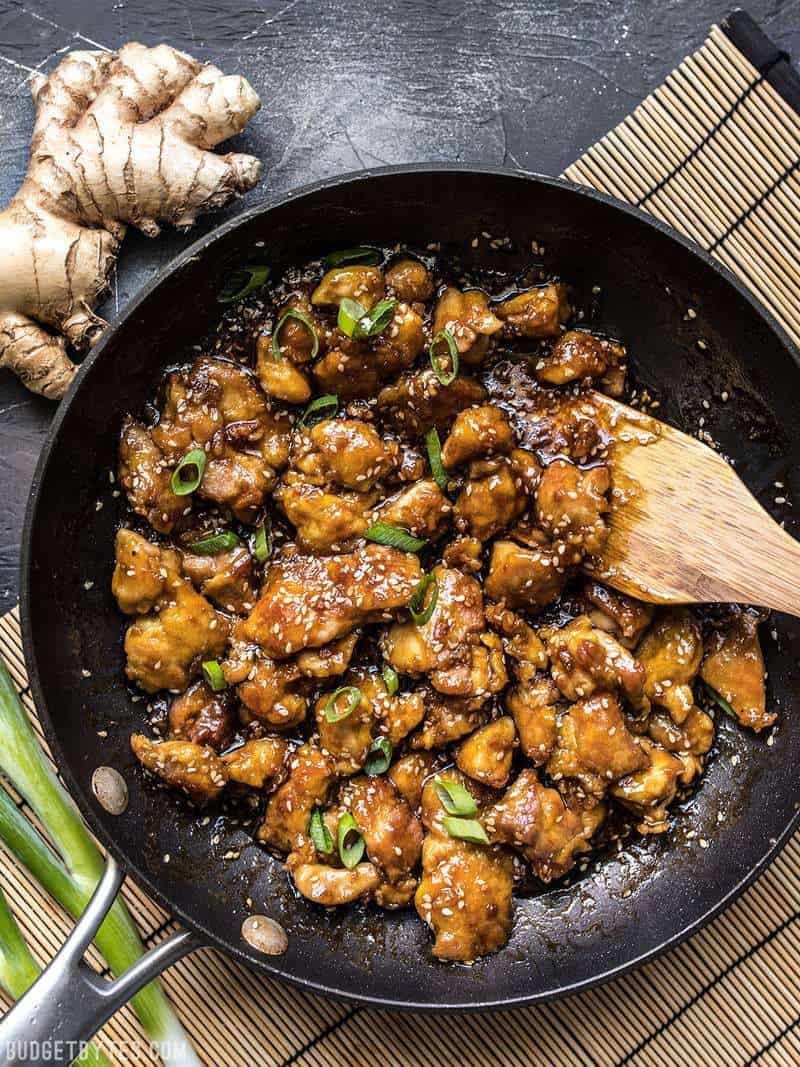
In conclusion, incorporate the previously prepared sauce and gently mix until fully coated. Keep stirring the chicken while the sauce starts to simmer and become thicker. Once it reaches the desired consistency, switch off the heat.
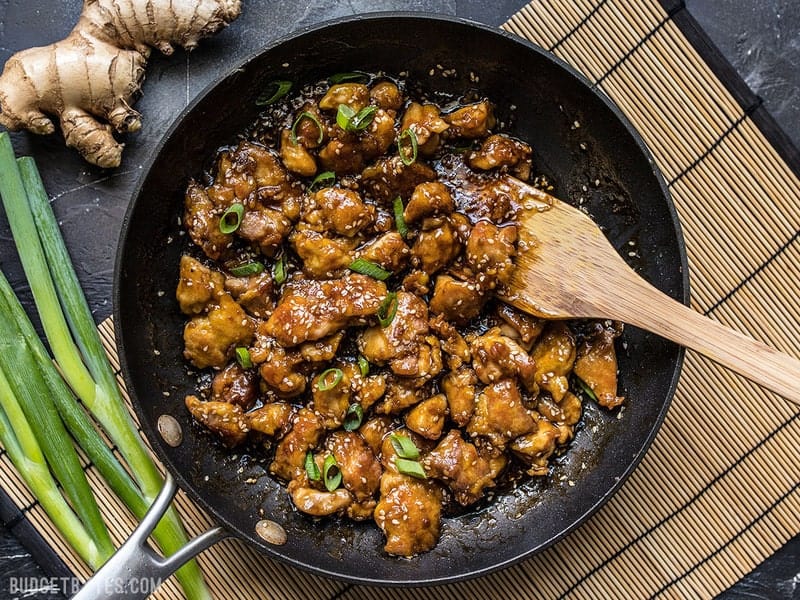
Top it off with a sprinkle of sliced green onions and serve alongside warm rice. Trust me, it doesn’t get any better than this!
Sesame Chicken made quick and hassle-free in just 30 minutes, with no additional delivery charges! 😄